 Hello, Crafters.
  I
hope you've had a great weekend. ☺
I
hope you've had a great weekend. ☺Just a quick note to remind you that there are just four days left before Sale-a-bration (SAB) ends on 31st. March 2017!
In case you missed the notification, last week Stampin' Up! added eight products from the Annual and Spring catalogues as SAB gifts.
I understand that some of these products have already sold out in the US!
A brief recap for you of the benefits of SAB:
First is a free gift for every €60/£45 you order, excluding delivery
Second is an extra €27/£20 in Stampin' Rewards if your order is €275/£200 or more
Third is an extra two free stamp sets of your choice if you join SU as a hobbyist or demonstrator, as well as the €175/£130 worth of products you choose for yuor €129/£99 Starter Kit.
If you live in the UK, France, Germany, Austria or the Netherlands, please contact me if you'd like more info: janb@janbcards.com.
 Alternatively, if you're in North America or South
Pacific regions, please contact your Stampin' Up! Demonstrator.
Alternatively, if you're in North America or South
Pacific regions, please contact your Stampin' Up! Demonstrator.Today's card is the first project I've made using the brayered Irresistibly Floral Designer Series Paper, which I shatred here with you last Thursday.
One of the suggestions I received - many thanks, Kaye - was to make a special birthday card and I'm sure someone else suggested using Vellum but unfortunately, I can't find it!
I still had my pre-cut Dazzling Diamonds Glimmer Paper shapes in a box on my desk and had a look to see what I could find.
I came up with the circle frame and the bow!

The bow was from the Wonderful Wreath Framelits Dies and I think I made the circle frame using an earlier set of circle dies we had.
I adhered the circle frame on to the Vellum using Tombow, and then adhered the completed circle to the card base, again, using Tombow.
Lower down this post, there are some photographs showing how you can achieve a similar frame using the Layering Circle Dies.

I adhered the die cut heart to the lower rim of the circle frame using glue dots. I wasn't sure what to do about the sentiment.
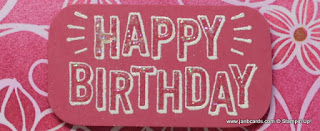
I chose HAPPY BIRTHDAY from the Confetti Celebration Stamp Set, and took a small piece of Rose Wonder cardstock.
I wiped this over with my Embossing buddy, inked the stamp in Versamark, stamped and covered with White Embossing Poder.
When I had finished heat embossing it, I painted the centres of the block letters, using my Fine Tip Glue Pen.
Then I sprinkled it with Dazzling Diamonds and allowed it to dry.
 I adhered this to the top of
the card using Dimensionals but I can't help feeling that I need some
Dazzling Diamonds Glimmer Powder up in the top area.
  Although maybe some
Rose Red white heat embossed and punched flowers at the bottom would
work better!
 Then I could also do the inside of the card - which I haven't done yet!
If I do this, I'll share another photograph!
Photograph 7 - this is the closest you can get to my size frame.
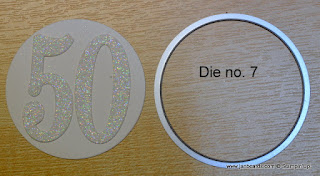
These two dies are both from Layering Circles Framelits Dies and are the largest scallop die, no. 8 and the second to largest straight cut circle die.
I have placed the two numbers in the frame so you can see the fit!
 Photograph 8 - the pink circle has been die cut with the largest, straight edge, no 8.
I have laid the pink circle on the white scalloped die cut scalloped circle.
Photograph 9 - this is the same as photograph 8 except I used die. no 7.
Notice at the difference in the fit of the 50 inside each circle.

Photograph 10 - this shows the largest scalloped circle as well as size 7 die cut sitting inside.
I hope this provides an acceptable alternative to the frame I used!
That's about it for today. Until tomorrow, happy crafting.

JanB.

No comments:
Post a Comment