Hello, Crafters.
What a difference a day makes? On Wednesday I had a super
time playing with the Delightfully Delicate Laser Cut
Specialty Designer Series Paper (DSP), and the Shimmer Paint!
Today was not so good! You may remember the last photograph
I shared yesterday was the quarter sheet of Whisper White
which I'd had behind the DSP when I was sponging it with
the Shimmer Paint.
My plan was to make a card with it yesterday to share today.
Unfortunately, when I was tidying up my desk yesterday
after doing quite a lot of admin/paper work, my quarter sheet
became caught up with my scrap paper which I tore in half
before throwing it in my bin! GRRR!
I did make a card which you can see here as promised
yesterday, and I'll explain yesterday's card as well as today's
card, plus I'll tell you the results of using my heat tool to
dry the sponged DSP and cardstock. I'm going in reverse
order starting with yesterday's card!
As I had torn my quarter sheet of Whisper White Cardstock (CS),
I re-did another sheet the same way I did Wednesday's sheet!
Although I knew I needed to do a new piece of DSP and
sponging so I could try drying the sponging using my Heat
Tool, I had thought I only needed to do a small area!
After I had completed a new quarter sheet, I had a go at drying
it using my Heat Tool. Normally when I use my Heat Gun for
heat embossing, I move it slowly until each area turns shiny,
but for the purpose of drying, I kept it moving all the time to
avoid spending any length of time on any one spot which I
thought might make the DSP or the cardstock warp.
It worked brilliantly and no warping!
Next I took a Dauber and went over the background CS with
Powder Pink Ink to fill in the areas that hadn't been touched
by the Shimmer Paint. Most of the time it gave a great effect
but there were a couple of places where the Powder Pink
Ink was grabbed on the Shimmer Painted area - I don't know
why it happened in just these two places. Unfortunately it
was sufficient to spoil the cardstock as my background piece.
I decided to cover the layer with a sheet of our Vellum CS
which worked well. I have taken a close-up photograph to try
and show you what I mean about the colour having been
grabbed on the area that had Shimmer Paint on it but it isn't
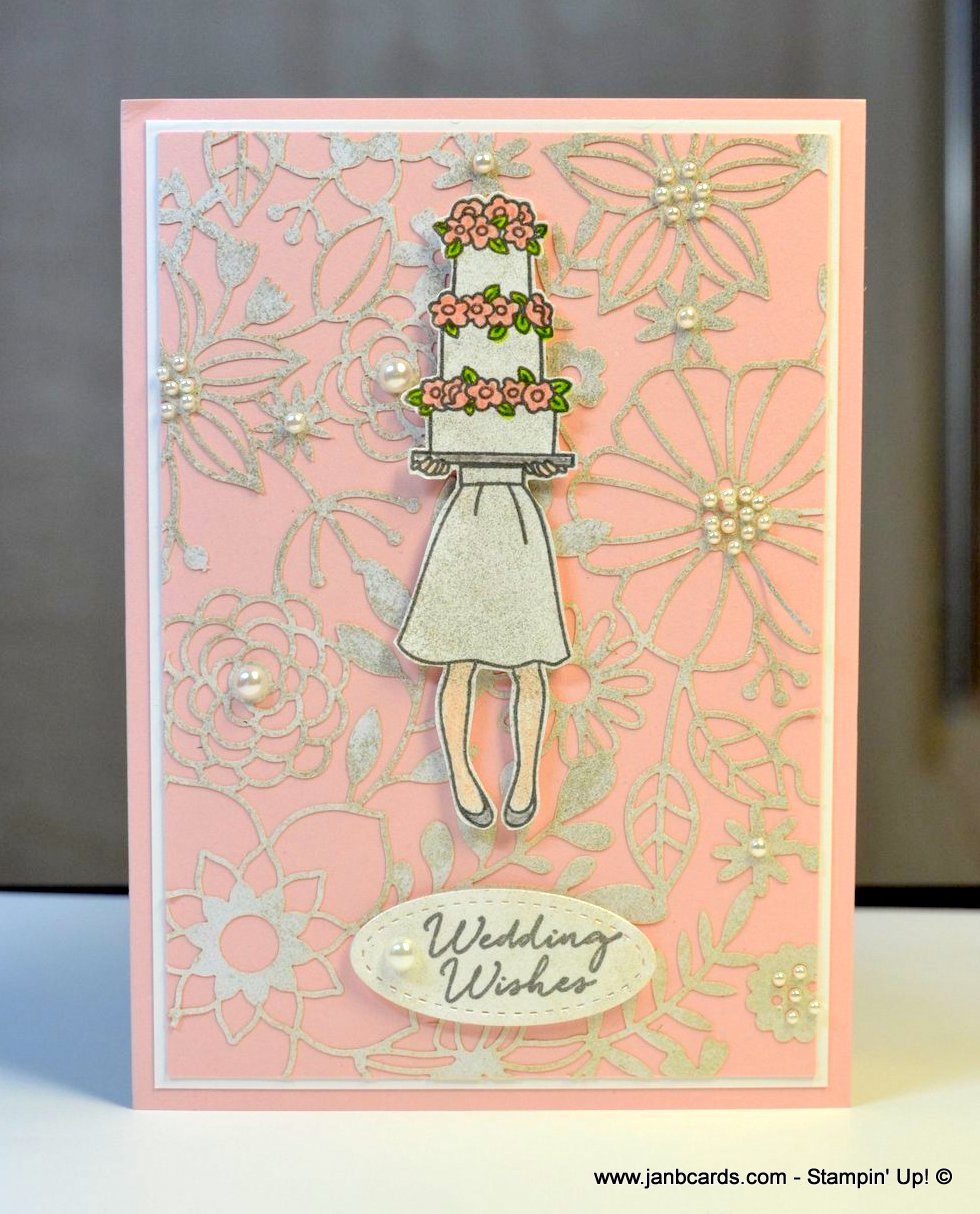
easy to see - see photograph below. I finished my card with
the same image as yesterday except I cut off the top layer of
the cake so I could fit it on the largest Stitched Shape Oval Die,
which I used to cover up a lot of the background paper!
I decorated the inside of the card with a large flower from
yesterday's DSP, that I'd sponged with Powder Pink Ink. On
Wednesday, I adhered this flower on some pink cardstock and
fussy cut it only to find I'd used Blushing Bride CS instead of
Powder Pink CS! I carefully peeled the flower off the cardstock
and used it inside today's card.
To put Wednesday's card together, I adhered the sponged DSP to
a layer of Powder Pink CS and trimmed off the edges that
were overlapping. I stamped, sponged, coloured and fussy cut
the image, and adhered it to the front of the card using
Dimensionals. I did the same with the sentiment and then
adhered Basic Pearls of varying sizes on the flowers that
had holes in the centres.
I finished this card by adhering another fussy cut cake inside
the card, and I have to say I was very happy with the finished
card! I have one more idea I want to use the Shimmer Paint
for so I hope to have that ready for you tomorrow morning!
In the meantime, that's it from me fortoday,
and until tomorrow, happy crafting.
JanB.
To purchase any of the products I used to make this card, please
click on one of the images below, and you will be taken straight
to my 24/7 Online Stampin' Up! Shop. I would really
appreciate your business.
Many thanks.
JanB.
Products Used