Showing posts with label Stamp Set - One Big Meaning. Show all posts

Monday, 26 June 2017

June Thank You Cards

Hello, Crafters.

I hope you've enjoyed your weekend.

Yesterday was a busy day for me as I had the second class of the weekend, and there was a lot of clearing up to do after all my ladies had left!

I don't know where it came from, but I seemed to get an abundance of energy from somewhere! 

I spent some time catching up with emails, and responding to comments on YouTube about the A Little Wild Baby Card video I uploaded yesterday.

Then I decided to work on my June customers' Thank You cards, and in next to no time I'd made them all! 

I ran out of our gold and silver Metallic Doilies, so I moved onto the retired Lace Doilies from the Spring Catalogue which retired on 31st. May, 2017.

For my Thank You cards,I used one design, and three different colour schemes! 

The idea was inspired by a card I saw in the Stampin' Up! Demonstrators' magazine, called Stampin' Success.

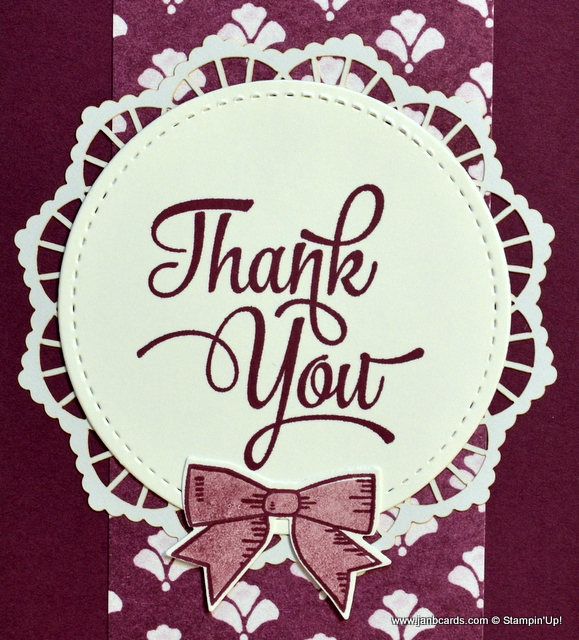
The first card I made was the Berry Burst card, then the Tangerine Tango, and then the Fresh Fig with the Lace Doilies.

As usual, I used our Notecards & Envelopes, and added a layer of cardstock, that was a quarter of an inch smaller than the 5" x 3.5". 

I adhered a piece of the Fresh Florals Designer Series Paper Stack, which was the same length as the Berry Burst Cardstock, and 2" wide. 

I stamped the sentiment, which is from the One Big Meaning Stamp Set, onto a piece of Whisper White Cardstock, using Berry Burst Ink. 

I die cut the sentiment using the Stitched Shaped Framelits, and adhered it to a silver Metallic Doily.

The bow is from the Holly Berry Happines Stamp Set which has been brought forward from last year. YAY!

I stamped the outline stamp onto a piece of Whisper White cardstock, using Berry Burst Ink.

Then I used the solid second-step stamp, using Berry Burst Ink stamped off once. 

I punched the bow out using the Holly Berry Builder Punch. 

Then I adhered all the elements in place.

I started to look for a suitable Designer Series Paper design that I thought would look good with the gold Metallic Doilies.

The Designer Series Paper I chose is called Whole Lot of Lovely, which I paired with Tangerine Tango Cardstock.

I think these two together make a very vibrant card! 

I'm giving up saying that I'm not normally an orange person, because I've said it several times recently, I'm obviously changing!

When I ran out of the gold doilies, I chose Fresh Fig to go with the white Lace Doilies. 
 
For the Designer Series Paper, I used another design from the Fresh Florals Stack that I'd used for the Berry Burst design.  

I don't normally put that much into my Thank You cards, but I was so pleased with the design, and I seemed to have an such abundance of energy, that once I'd started, I didn't want to stop! 

I'm really pleased with the end result and this card was a real pleasure to make!

That's about it for today. 
 
Until tomorrow, happy crafting.

JanB.

Monday, 6 February 2017

February Thank You Cards

Hello, Crafters.

Yesterday I was working on my February Thank You cards and I started by using the Sale-a-bration Stamp set called So Very Much. 

It's consists of one large stamp and four small ones. At the beginning of January I received a Happy New Year/Thank You card from a friend who had used the large Thank You stamp.
 
I asked if she minded if I CASE'd her card, so I made a start. 

Unfortunately, it didn't occur to me - initially - but Kimberley had used an A6 size card, and I'd tried using one of our Notecards which measure 5" x 3.5". 

As the Thank You is so big, I really struggled and the only way I could use this stamp was to stamp it directly on to the card front. 
 
This didn't leave me any room for the layering that had made Kimberley's card really pop. 

In the end I chose the easy option but first of all, more about my inspiration card!

Kimberley started with a card base of Whisper White card stock, added a layer of the Flirty Flamingo 2016 - 2018 InColour Envelope Paper, and a top layer of Whisper White. 

On the top layer, she used Mint Macaroon Ink and stamped the splash mark stamp from the Gorgeous Grunge Stamp Set. 

Kimberley then stamped Happy New Year - I think this is from Teeny Tiny Wishes Stamp Set - in a random manner on the top layer. 

The piece de resistance is the way Kimberley stamped the Thank You sentiment!

At the moment I can't lay my hands on where she explained how she achieved this, so the following is to the best of my memory, or at least, how I would try!

First of all, ink the stamp in Versamark and then in Emerald Envy Ink, stamp and quickly sprinkle over the ink with our Emerald Green Glitter Embossing Powder and finally heat set. 

This embossing glitter was available in the Christmas Catalogue.

I gave up on my planned Thank You cards and decided to do something at least using my 2015 - 2017 InColour Envelope Paper.

It wasn't until I'd finished the first batch that I realised that I was doing more or less the same as I did for my October Thank You cards, except this time I was using Enelope Paper.

I persevered because I'd lost quite a bit of time tryng to get the Sale-a-bration Thank You stamp to work!

Although I still have quite a few more to make, I have concentrated on the Tip Top Taupe woodgrain and stripe designs - I'll be sorry to see this colour go in May, together with Mint Macaroon!

To make my cards, I put a layer of the envelope paper on the Notecard. I stamped the Thank You sentiment which is from One Big Meaning Stamp Set. I die cut the sentiment using the Stitched Shapes Framelits - some squares and some ovals; then I layered them onto Layering Ovals, or Squares Framelits. The final step was to add a small flower as decoration.

I need to get busy and get the rest made! My hostess gifts for my January online customers will arrive tomorrow, and I need to get them in the post without delay!  

That's about it for today. Many thanks to Kimberley for letting me share your card! Untill tomorrow, haappy crafting, JanB.


Sunday, 5 February 2017

Reflections Technique Video

Hello, Crafters.

I spent a lot of time of Friday and Saturday practising this techniques using different cardstock and inks. 

I first tried this a few years ago when I saw a video by Dawn Griffiths of Dawn's Stamping Thoughts - thanks for the inspiration Dawn! 

There were 4 different cardstocks and three types of ink which would have meant testing twelve different combinations!

I didn't go quite that far but the bottom line is that I found our Basic Black Archival Ink, Stazon Jet lack and Memento Tuxedo Black all worked equally as well. 

Although I use our ink for everyday, I personally prefer to use Stazon for this technique. 

The cardstock I tried was our thick Whisper White, Shimmery White Card, regular Whisper White and Very Vanilla, and all four took well to the reflections techique.

Because I also used our new Watercolour Pencils and a Blender Pen for this card, I found that Shimmery White CS was best. 

I uploaded the video earlier this morning.

Photographs 1 - 3: this is the card I made on the video. 
 
The dress colour is Bermuda Bay and I used the same pencil for both the dresses. 

This is one of the great features of Watercolur Pencils i.e. it's so easy to change from dark to light, and vice versa. 

Photographs 4 - 5: the dresses in both these photographs are Rich Razzlebessry - another example of how easy it is get very different shades when using Watercolour Pencils.

Photograph 6: this is another Bermuda Bay dress but this time on Thick Whisper White Cardstock.

This is the card that made me decide this is the CS I like least although I do say on the video, this may be the painter's fault! LOL! 
 
Photograph 7: This is the design Dawn used on her video all those years ago - it hasn't dated at all. 

I now need to decide how I'm going to use this now to make a completed card. 

Photograph on the video: this card was a real surprise in as much as I didn't press too hard on the Watercolour pencil.

I wanted a pale red dress but the finished result is more like Calypso Coral!

The design of my reflections card is suitable for any celebratory event but I have chosen mine to be Thank You cards because the dancer has been made happy by someone! 

I hope you give this technique a try, it's very satisfying! I wish you a happy Sunday and until tomorrow, happy crafting.

JanB.   

Monday, 31 October 2016

October Thank You Cards

Hello, Crafters.

I hope you've had a great weekend. 

I've finally finished all my 120 swaps for the Telford Convention this coming weekend, as well as all my October customer Thank You gifts and Thank You cards.


Whilst I was working on my Thank You cards, I had an idea which hubby says should be a video but the jury is still out at the moment! LOL!

It has meant the first four Thank You cards have been shelved for the time being.

I started my card using our Notecards & Envelopes. 

My first colour choice was Cucumber Crush and then I moved onto Delightful Dijon.

I cut a piece of the stripe design from the 2015 - 2017 InColour Designer Series Paper (DSP) Stack and adhered it to the card front using Tombow. 

I chose the Thank You sentiment from the One Big Meaning Stamp Set and stamped it on a piece of Whisper White Cardstock.

I die cut it using one of the straight cut dies from the Layering Square Framelits Dies. 

I layered it onto a piece of coordinating cardstock (CS), that I'd die cut using a larger scalloped square from the same set of layering dies.

I adhered them together with Tombow and then onto the card front.

I decided I wanted to add something more to it but I didn't want to use my usual favourites of butterflies and flowers. 

This was partly because I need a masculine Thank You card this month. 
 
My first thought was to use the Owl Builder Punch. 

I punched one out in the coloured CS and them one in Whisper White CS. 

I made two owls by using all the punched  shapes.


Then I had a look through my stamp book to see what I could use that had coordnating dies. 
 
I didn't get very far - I stopped at Bears Hugs!

I chose to use the small bear, the honey pot and the fish. I stamped all the images, some as tone on tone onto coloured CS and some on Whisper White CS.

I only did two fish because I thought it looked a bit odd on its own - what do you think?

It was too big to put with the small bear!

I made as many Thank You cards as I need for October plus a few extras. 

That's about it for today. Until tomorrow, happy crafting.

JanB.