Showing posts with label Stamp Set - Rooted in Nature. Show all posts

Friday, 22 June 2018

White Heat-Embossed Vellum Flowers

Hello, Crafters.

What a fabulous week it's been for me! I'm still on Cloud 9! 
My card today is definitely what I call a Topsy card i.e. it just grew
 (Uncle Tom's Cabin). And because my card grew, I finished up 
using four stamp sets, which I always consider to be a bit excessive. 
 It would have been three sets if my first choice of flowers had
 followed through, but hey ho, these things happen! My original 
flower choices were the two outline flowers in the Oh So Eclectic 
Stamp Set. I stamped the open flower image onto my top layer
 of Blushing Bride Cardstock (CS) using Blushing Bride Ink.
I stamped three images of each flower in Versamark on Vellum CS
 and then heat-embossed them using Whisper White Embossing 
Powder. I painted the backs of each flower using my Light 
Rich Razzleberry Stampin Blend'.

 I die-cut the flowers using dies from the Eclectic Layers Thinlits 
Dies, but whichever way I tried to arrange the flowers on my 
smaller piece of Blushing Bride CS, they were just too big! I decided
 to try the two outline flower designs in the Cake Soiree Stamp Set. 
Next I created three Whisper White heat-embossed flowers 
of both designs on vellum, but left them unpainted!
After I'd die-cut them using the Sweet Cake Framelits, I found I had 
plenty of options as to which way I could arrange them. I used the stem
 image from the Touches of Textures Stamp Set, and stamped three
 images at various heights, using Granny Apple Green Ink. 

I adhered one large, and two smaller flowers on top pf the stems using
 Dimensionals, and I was really pleased with theresult! Before I adhered
 the image to the card, I wrapped a piece of our gorgeous 3/8" Mini 
Ruffled Ribbon in Powder Pink around the image. To keep things simple,
 I tied the ribbon into a knot!
 I struggled to find a sentiment I liked to fit in the small space just above
 the flowers so settled for JUST FOR YOU which is from the Rooted 
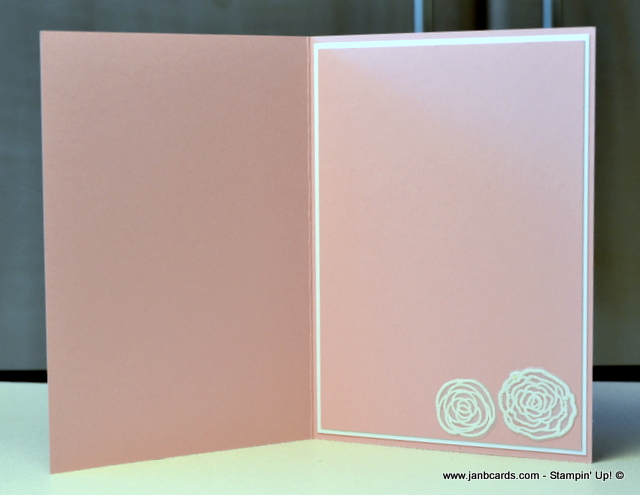
in Nature Stamp Set.Inside the card I added a layer of Whisper White CS 
and then a top layer of Blushing Bride CS. One of the large 
heat-embossed flowers disappeared - and I still haven't found it! - so
 I adhered the remaining two flowers in the bottom right-hand corner.

 At this stage I think I lost concentration for a while because I normally
 have a Whisper White CS layer on top inside my cards. Although
 it wasn't  planned, I think the card looks really nice with a Blushing
 Bride inside, and it's cetainly light enough to stamp and/or 
write a sentiment on! 

That's it from me today, and until tomnorrow, happy crafting.

JanB.

Sunday, 3 June 2018

Never Ending Card Video

Hello, Crafters.

I hope you're enjoying your weekend. Today's video is an 
old favourite that totally fascinating i.e. the Never Ending Card! 

The first time I made one of these it was for one of my grandsons'
 birthday's. Stephen was totally bowled over by his card and forgot
 about opening by the parcels that were sitting on the
 table waiting for him! 
 Before I made today's video, I had a practice run with a 
masculine card to remind myself how to make the never-ending
 card. It only took me two card bases to remember what I used
 to do to avoid haveing the flaps catching on each other! 

After I made the masculine card, I started to plan a feminine design.
I knew this video was going to be a long one, so I made all the
 images and sentiments I want for every page beforehand, and 
made them beforehand. 

This meant I didn't know before I started what the finished card would 
look like so I was on a wing and a prayer. It all went very well, 
except for some reason, I didn't get the section of the card where
 only the top half is visible until the next part of the card is opened.

 It threw me for a little while but I carried on and was really pleased
 with the result. I would love to know how I avoided the partial
 panels! Any ideas?
 On Friday, when I said  was going to post my blog four days 
a week instead of seven, I should have said I will be posting a
 new card or 3D project four times a week. This allows me to
 post to my blog when I have news to share as opposed 
to a new project! I hope this makes sense! 
  I wish you a very blessed Sunday, and until next time, happy crafting.

JanB.

Wednesday, 23 May 2018

The Retiform Technique Video

Hello, Crafters.

I have wanted to try the Retiform technique for at least five 
years - ever since I first saw it demonstrated by GinaK, but 
have never given it a go!
  I was inspired by a lady in my team, who has made several in 
the last week or so and I just had to have a go. If you'd like to 
check Nana out, please visit her Facebook page at Hand
 Made by Nana!
To create my first card I used Crumb Cake, Sahara Sand and
 Night of Navy Inks, and SIX Stamp Sets, which is clearly not 
a good idea for a video! I made the card again using the same
 ingredients, and changing some details  that I
 considered looked wrong. 
 For example, I used Whisper White Cardstock (CS) for my first 
card, but Very Vanilla CS was so much more suitable. I moved
 onto my third card with my mind set on just one or two stamp sets! 
Using the Rooted In Nature Stamp Set (this is a two-box set!) and
 Call Me Clover Ink, together with Crumb Cake and Sahara Sand Inks. 
There are sixteen stamps in the Rooted in Nature Stamp Set
 which includes ten images, which means it's possible to use a different
 stamp in each of the nine segments in the design of this card! 

I used seven different images, and chose the HAPPY BIRTHDAY
 sentiment from the Beautiful Bouquet Stamp Set.
Two of the aspects I really enjoyed about this technique is that 
it's OK to use one image more than once in a segment, and also, it's
 OK if you place an image facing any direction, including upside down! 
I thoroughly enjoyed learning, and practising this technique, and look 
forward to trying it again sometime soon! If you've never tried this 
technique before, I really recommend that you do! I think this style of 
card makes a great masculine card for any occasion!  Do you agree? 
Well that's about it for me today, so until tomorrow happy crafting.

JanB.