 Hello, Crafters.
It's the weekend again and I hope you enjoy yourselves with your family and friends.
Are you ready for Christmas - gift shopping done, Christmas cards made, written and posted, decorations up - inside and out?
For me, tick no to the above, except I have MADE all my Christmas cards!
Today's card was inspired by the first Christmas card I received this year.
It was from my friend Lindsey who lives in Queensland, Australia!

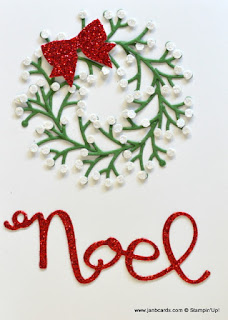
I started my card with a base of Whisper White Cardstock (CS), a layer of Red Glimmer Paper and a top layer of Whisper Whiste CS.
I adhered the Red Glimmer paper to the card base using Tombow.
I used Garden Green CS to die cut eight of the mistletoe branches from the Pretty Pines Thinlits Dies.
For the mistletoe berries, I used my 1/8" Handheld Circle Punch and punched out 72 berries from scraps of Dazzling Diamonds Glimmer Paper.

That's nine berries for each branch!
I used Tombow, and a lot of patience, to adhere the berries to the branches!
I used one of the Layering Circles Framelits Dies to draw a light pencil circle where I wanted my wreath to be.
 Before I adhered each branch on
to the Whisper White layer, I cut the stem off where it meets the first
branch.
 I used Tombow to adhere the stem on the pencil circle, positioning the first one at N, the second one at NW, the third one at W, the fourth one at SW, etc.
By concentrating on the compass points meant I was able to keep an even space between the branches all round the wreath.
 The Red Glimmer Paper bow was punched out using the Holly Berry Builder Punch and adhered on top of the wreath using Glue Dots.
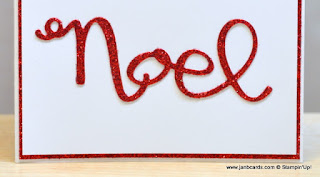
The die for the Noel is from the Wonderful Wreath Framelits Dies and has been die cut using Red Glimmer Paper.
I adhered this to the Whisper White layer using Tombow.

The final job was to attach the top layer to the card base.
I used Glue Dots as I was adhering it to a layer of Glimmer Paper.
Although Tombow would have worked just as efficiently as Glue Dots, I find it needs to have pressure applied for several minutes to give it a chance to get a really good grip.
Glue Dots are instant, and for this job, are amazingly strong!
That's it for today. Enjoy your weekend, and until tomorrow, happy crafting!

JanB.

What a beautiful and unique looking card! Just the perfect balance of the red and green and love all the sparkle. This is one I will most definitely be doing, and thank you for sharing!
ReplyDeleteHi, Geraldine. This card is good for giving your hand a work out punching all the berries! ☺ Happy crafting, JanB.
DeleteLove this card. The green and red are striking on the white.
ReplyDeleteHi, Ina. Thank you. I'm so pleased you like this card. ☺ Happy crafting, JanB.
Deletelove this card too. so pretty. i love the traditional colors. i find it hard to use pink etc. i too live in Qld Aust. but it is a very big state. cheers Jan
ReplyDeleteHi, Pearl. I love the traditional colours, too. It'd be funny if you both lived down the road from each other! ☺ Happy crafting, JanB.
Delete