
 Hello Crafters.
Yesterday I decided to check the difference between the die cut figures from the Birthday Memories Designer Series Paper (DSP), and the die cuts from the co-ordinating stamp set, Birthday Delivery.
As far as I know, being able to die cut from DSP is a first for Stampin' Up! Does anyone know it's ever been offered as an option before?
Photograph 1: this is the photopolymer stamp set which has a total of twenty-three stamps.
 I have started to label my stamp sets with the name of the co-ordinating dies. On the sheet of dies, I put the name of the co-ordinating stamp set on the back of the magnetic sheet together with my sample die cuts from the set.
I know some people store their dies in the same box as the stamps, which I thought was a great idea, not least because the amount of space it saves. The only reason I didn't go ahead with this is because I wasn't sure what would happen if one die set went with two or more stamp sets, and vice versa.
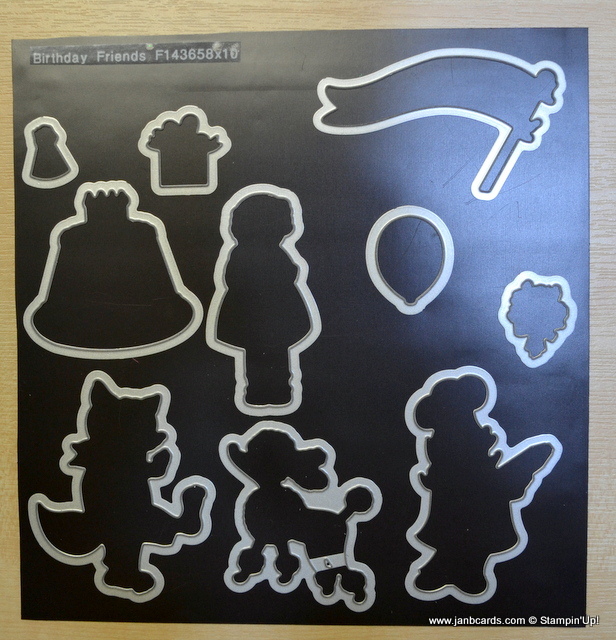
Photograph 2: this is the set of dies called Birthday Friends.
 There are a total of ten dies: the fox, the banner, the chef, the little girl, the poodle, the cake, the party hat, the gift, the balloon and the bunch of flowers.
 Photograph 3: this is the co-ordinating Birthday Memories DSP.
I have arranged the sheets so you can pick out where all the die cuts in photograph 4 are from. Unfortunately I forgot that the bunch of flowers is from the reverse of one of these sheets! DOH!!
 Photograph 4: these are samples of all the images that can be die cut from the DSP.
I die cut the green ballon even though it was being overlapped by a blue balloon.
I did this to show that the green balloon can still be used, if a green balloon was needed, and this was the only one available.
You just need to make sure it's overlapped by another colour!
Photograph 5: These are two images I decided to fussy cut as I was working through this yesterday evening! LOL!
Photograph 6: I used a piece of Whisper White Cardstock and Night of Navy Ink to stamp the images from the Birthday Delivery Stamp Set.
I didn't want to use archival ink or any of the reds because they would have stained the stamps - Night of Navy just cleaned right off!

Photograph 7: these are all the stamped images, die cut. As a stamped image the little girl has her back to us but as an image from the DSP, she's facing front.
 The chef is the only image that doesn't apprear on the DSP as a figure that's suitable for die cutting.
  He's depicted on the back of one of the designs I've shown but nowhere near as big as the die.
At the moment I don't have any plans for the DSP die cuts but I imagine I will use them for a card or two. The stamped die cuts will be adhered to the cardboard backing to the magnetic die sheets.
I hope you've enjoyed seeing this comparison of die cuts available in the suite. ☺
I hope you have a great weekend. Until tomorrow, happy crafting.
JanB.
Thank you for this. I just ordered the bundle and was hoping it would be as wonderful as I thought. This is amazing.
ReplyDeleteHi, Ina. It's a fabulous bundle, you'll love it. I's a great addition to be able to die cut the Designer Series Paper as well as stamped images! YAY! ☺ Happy crafting, JanB.
DeleteLove it when dies correspond with stamps but to have a matching design paper is great wow. Looks like a very fun set ☺
ReplyDeleteHi, Fiona. What a great idea! SU are always coming out with new ideas! ☺ Happy crafting, JanB.
Delete